Step 5. Attaching the Cross Rafters
a) The Ledger Board
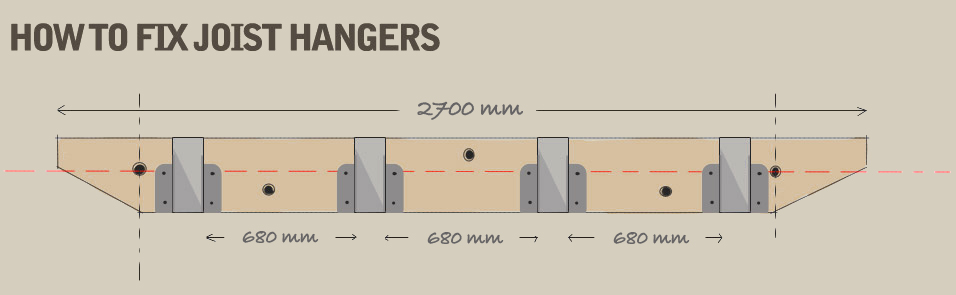
If you have not already attached the joist hangers to the ledger board in Step 3, the first task is to fix them to the non-decorated end of the cross rafters. Use the two fixing holes (one triangular the other circular) on either sides of the joist hangers to attach them to the rafter with the 1inch (25mm) non recessed wood screws provided. As you have already 'marked-up' the positions of the joist hangers previously, when the ledger board was being prepared, it is important that you follow the spacings between the hangers and make sure that when you offer up the joist hanger end that it is placed exactly in between the 40mm markings you have already made as this will ensure that the final structure is aligned perfectly.
If you have order one of our larger modules (MOD2 or MOD3) the joist hanger will 'straddle' the line where the two non-decorated ends of the ledger board (MOD2) or the non-decorated extension pieces (MOD3) butt up against one another. So, you will fix, with 2 screws, one side of the joist hanger to the first ledger board and the other side of the joist hanger will be fixed (again with 2 screws) to the second ledger board (MOD2) or extension board (MOD3) and so on.
Lift up the first rafter (you will need a second pair of hands here to help!) and resting the decorated end on the Main beam, offer up the joist hanger end to the pre-marked ledger board and when correctly aligned screw in using the 1inch (25mm) non recessed wood screws provided. You only need to use 2 screws per side to provide a full and firm fixing. Using both your spirit level and builder's square, make sure that each rafter is 'square' with relation to the ledger board before final fixing.

a) The Ledger Board
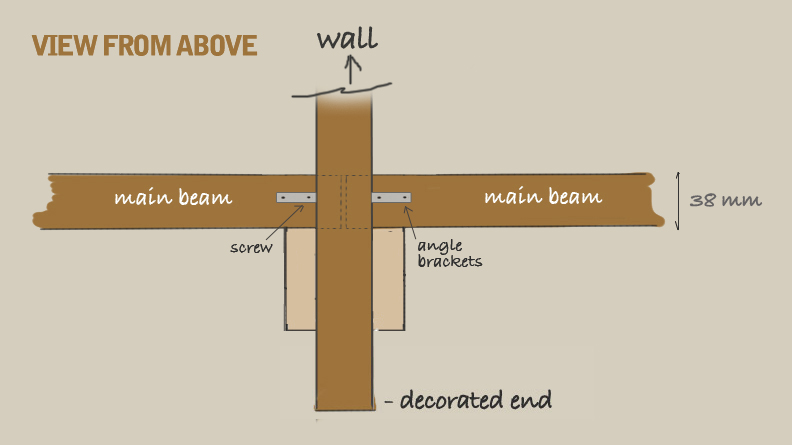
The rafter(s) are lying on top of the main beam so before fixing ensure that they are at right angles to the wall and main beam itself by using your builders square. You can also double check by making sure that the measurement between each rafter is the same 680mm at the main beam end as it is at the ledger board. Start off by fixing the outer rafter first and make sure that the decorated end is positioned centrally over the post. Once done, fix the rafters to the main beam using the right-angle brackets and the 25mm recessed screws provided. Although the angle brackets have 3 fixing holes per side you only need to use 2 of them to fix to the main beam and 1 to fix to the rafter to achieve a firm fixing. A good tip here is when fixing the right angled bracket to the rafter use different holes on either side to ensure that the screws do not foul in the middle. See Fig 20 & 21 below
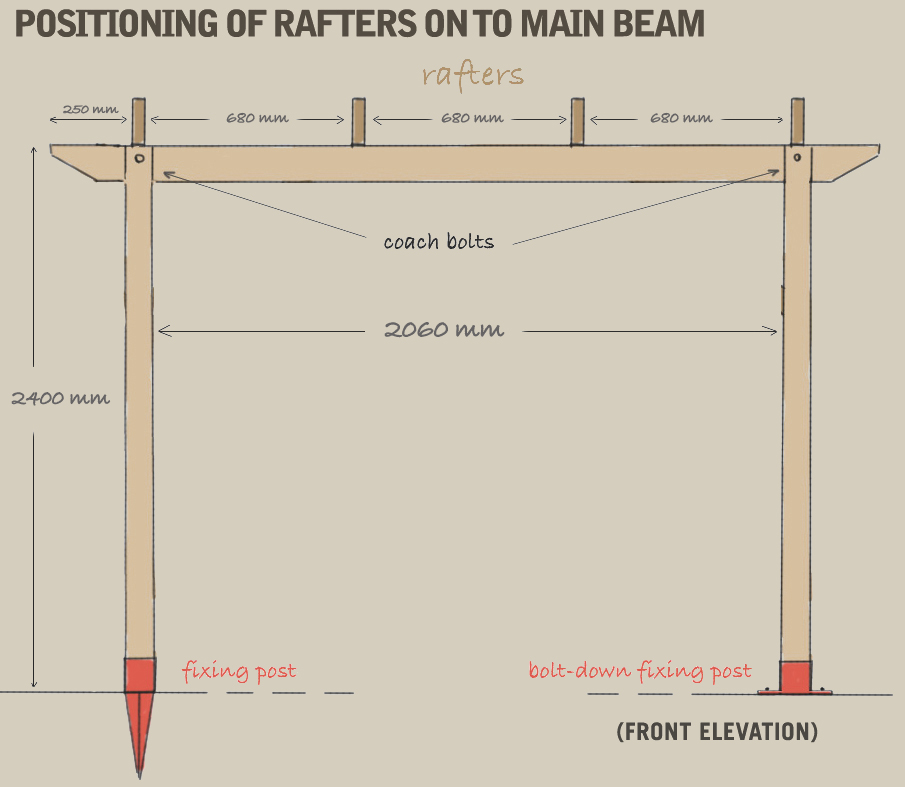
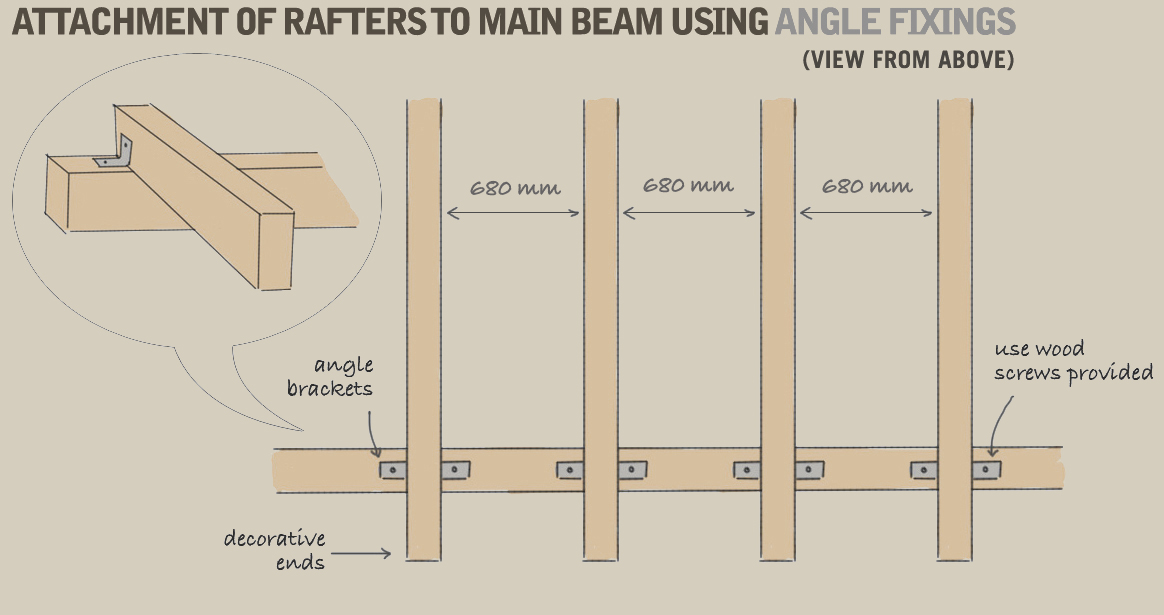
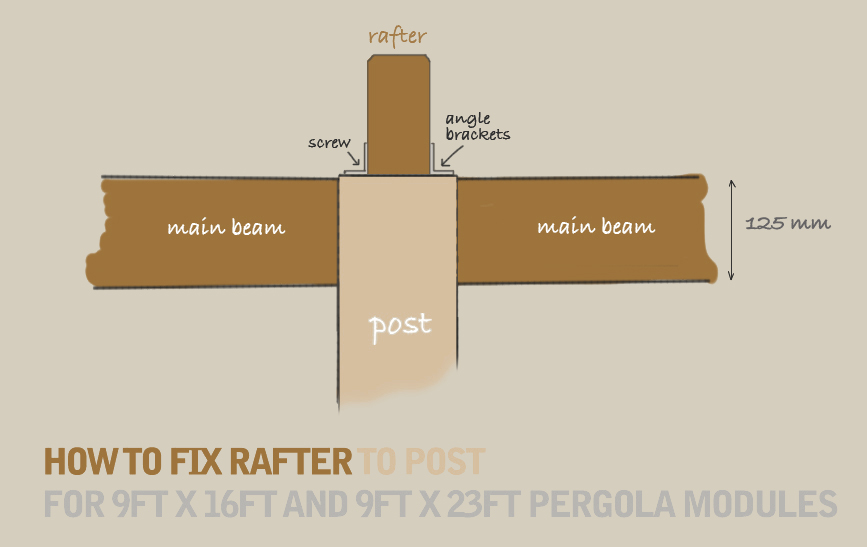
Fig 22 & 22A below show that the rafters fix centrally to the tops of the post and give further structural support when screwed in place.
(*NB these drawings are for representation purposes only and not to scale)