Step 1. Staking out & positioning of the posts
Once you have prepared and measured the site it is a good idea to stake out the area (Fig 6) and mark clearly where your posts will be situated.
Positioning of the Posts:
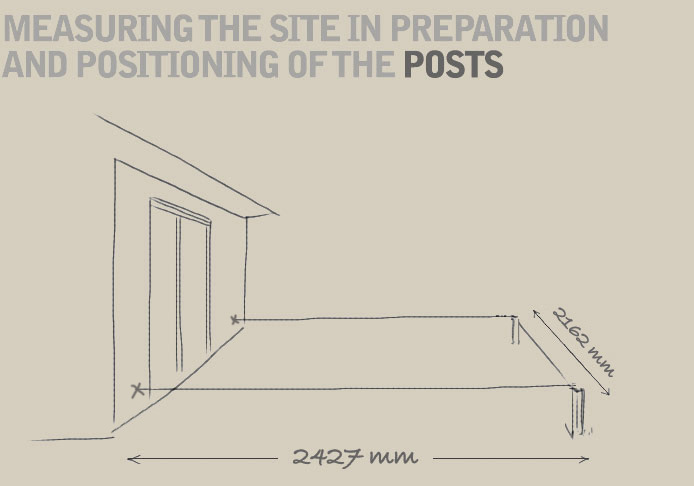
Using a tape measure or a piece of string, mark a spot exactly 2427mm from the wall using a builder's square to ensure that the line is at right angles (90 degrees) to the wall. This will be the position for the first Fixing Post. Once you have found the spot, mark it carefully if you need to dig a hole for the 'concrete-in' Fixing Post. If you are using the 'bolt-down' Fixing Post onto a patio or hard surface, simply put a cross using some chalk, marking the centre of where the Fixing Post will be positioned.

To mark the position of the second Fixing Post take your piece of string or tape and mark out 2160mm from the centre of the first Fixing Post to the centre of the second fixing post, parallel to the wall, again using your builders square to ensure that the two Fixing Posts are aligned. To make sure that the footprint is completely straight use the builders square to check that all corners are 90 degrees.
Depending upon the length of the pergola, and where it will be positioned on the wall of your house, you will see from Fig 8 below how the 'footprint' of the pergola will look.
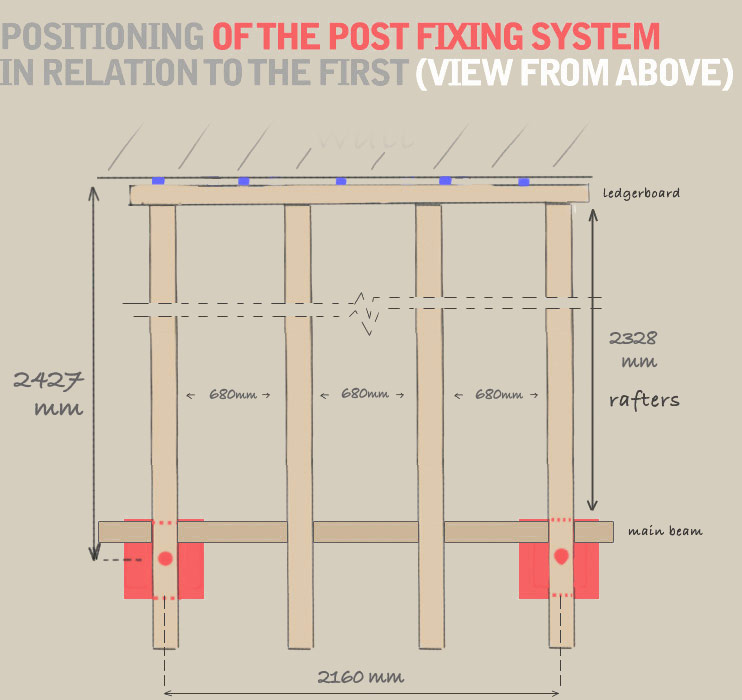
(*NB these drawings are for representation purposes only and not to scale)