Step 4. Attaching the Main Beam(s) to the Posts
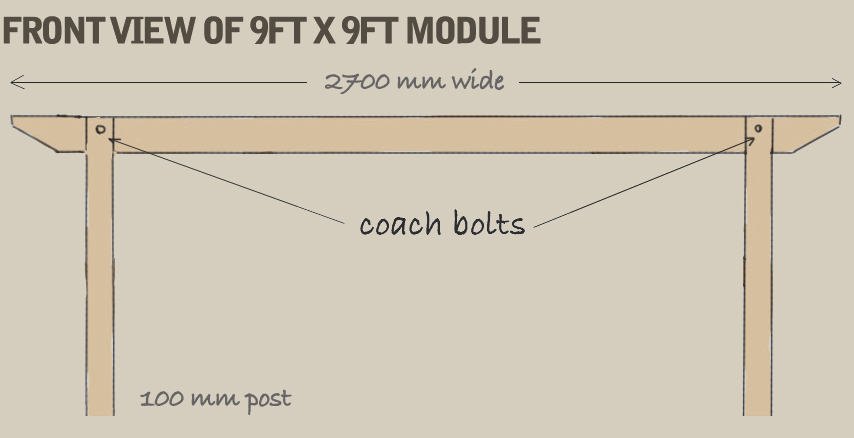
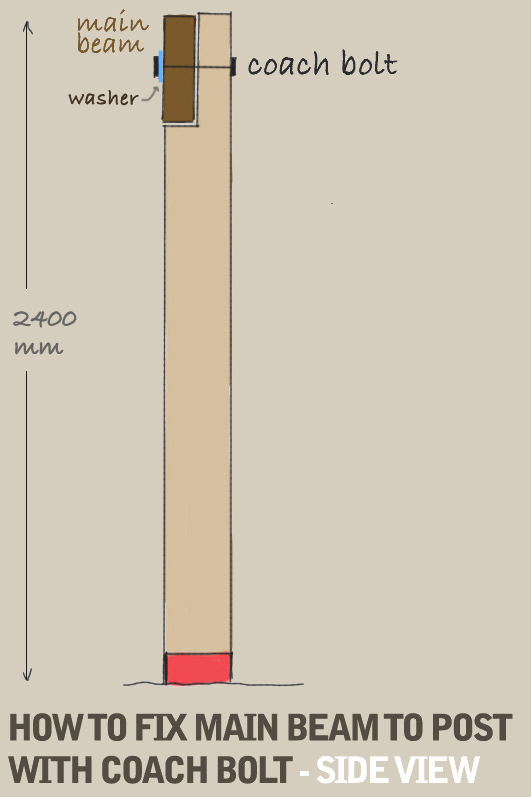
The next job to tackle is attaching the main beam to the posts. Line up the pre-drilled holes on the posts and the main beams and thread the coach bolts through. If it seems a bit tight, gently tap the bolt through with a non-metal mallet to prevent damage to the silver dome head then fix with the nut and washer provided and tighten. Do not forget to put the washer on as this will help prevent the nut from damaging the wood and make it easier to undo in the future. For best results, push the coach bolt through leaving the head visible on the outside of the post and the bulky nut on the inside (See Fig 14 & 15 below).
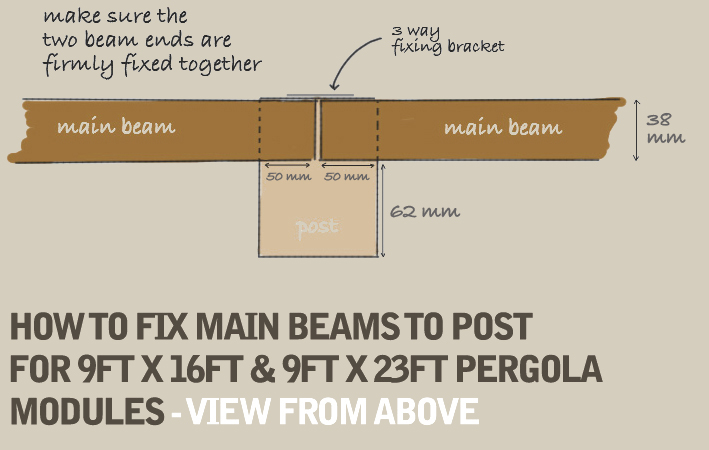
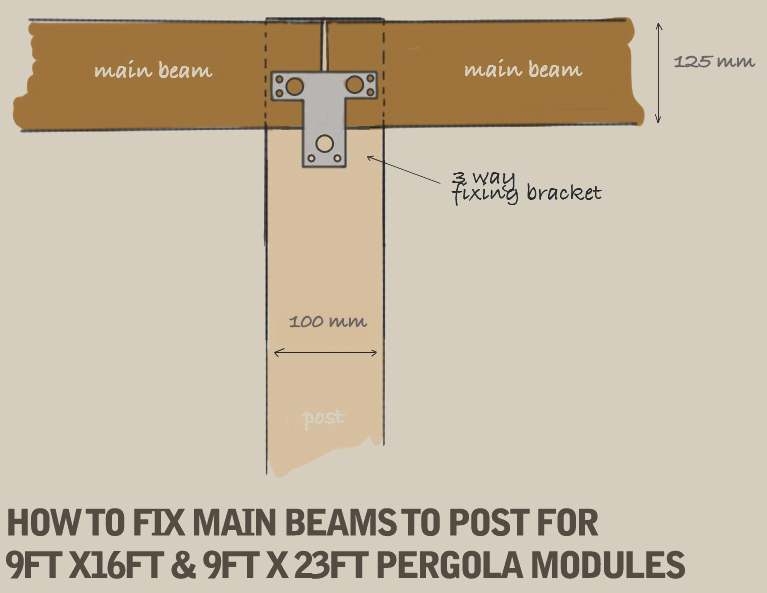
If you have ordered either the 9ft x 16ft or 9ft x 23ft pergola modules, you will need to join together two main beams (for the 9ft x 16ft module) or two main beams plus the central extension board (for the 9ft x 23ft module) using the supplied 3–Way ('T' shape) fixing plate as illustrated in Fig16 & Fig 17 below. These longer modules have been design in such a way that the join will fall in the centre of the 'notched' post, so before fixing in place with the 3-Way fixing plate, check that there is no gap between the boards. These central post(s) do not have the coach bolt, washer and nut fixings as these are only required on the outer posts.
(*NB these drawings are for representation purposes only and not to scale)