Step 2. Securing the posts to the ground
There are 2 different methods for you to choose from:
- Bolt-Down Fixing Posts
- Concrete-In Fixing Posts
When ordering, you will be prompted as to which method you require
Post supports – Installation instructions:
1) 'Bolt - Down' Support
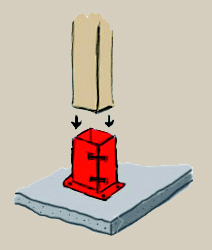
As this version of post support is flush fitting, it is ideally used for situations where your structure is to be sited on an existing patio, concrete or decking (ie: hard standing). Using the base as a template, mark the holes on the surface, drill and then secure using the bolts provided ensuring that they are tightly screwed in.
2) 'Concrete - In' Support
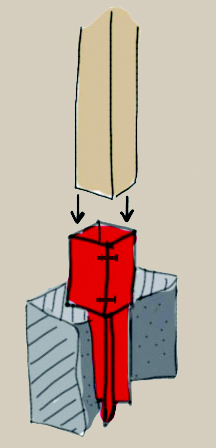
These supports are best used in areas where the ground is particularly stony or prone to very wet earth. You will need to visit your local builder's merchant or garden centre and purchase a bag of quick drying ready mixed concrete and we have found that one bag per post fixing is best. Depending on manufacturer, it usually takes about 15 minutes to set and retail at about £3.25 per bag. Once done, dig out a hole (where you want to place the post) approximately 12 ins diameter x 12ins deep in size, and place enough of the prepared quick drying concrete to fill the hole. Next, insert your post support into the centre of the hole and check that it is vertical aligned. Once, the concrete has set the post can be placed in the support.
Both of the above versions can be painted if required and will ensure years of maintenance free, secure anchorage. If, for whatever reason, you have cause to change the timber post, you can simply loosen the holding bolts, take it out and replace with another without having to re-dig, drill or concrete in any new post supports. To ensure that the posts are completely straight, it is a good idea to use a spirit level as it is vital to the whole structure that the posts are in line and vertical. Please make sure that the 'notched' side of the post faces inwards as you will be attaching the main beams to this side in the next Step.